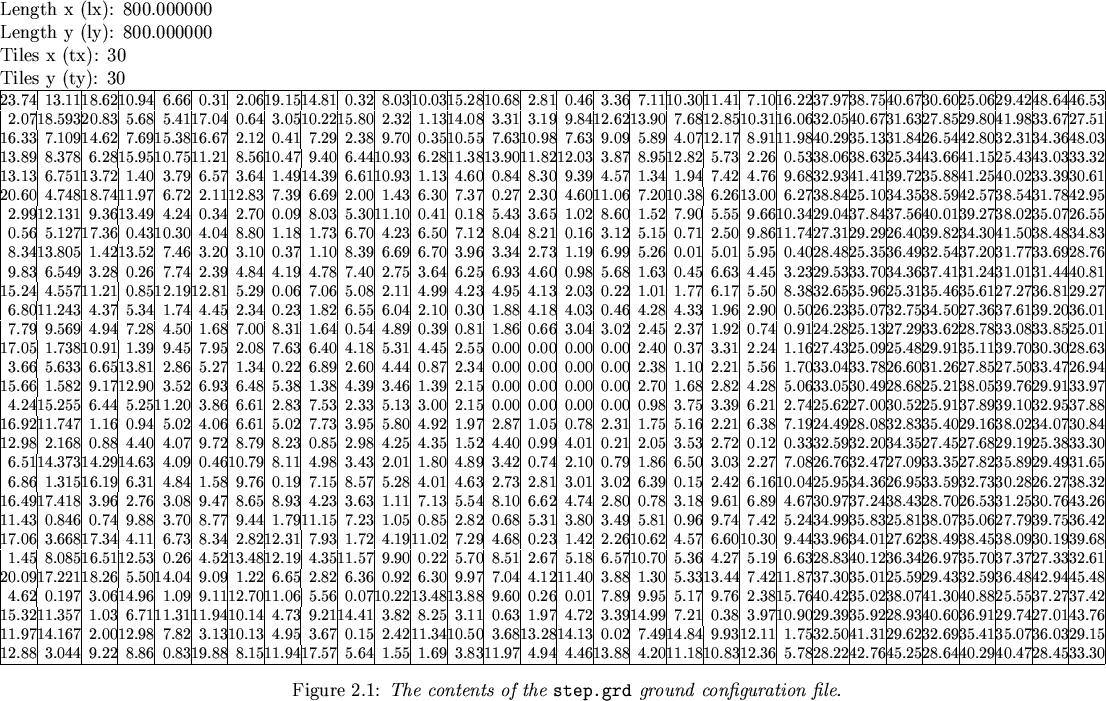
The ground is simulated with a triangular mesh with control points regularly distributed in the X-Y plane of the world and symmetrically placed around the Z axis.
The ground configuration file contains a description of this mesh. First, we have to define the dimensions of the ground along the X and Y axis: lx, ly. The ground is placed in the rectangular area comprised between points
(-lx/2, -ly/2)
and(lx/2, ly/2)
Then we have to define the density of the mesh. To do that we indicate how many tiles (tx and ty) are required to cover lx and ly distances. The number of control points to be placed along lx and ly are tx+1 and ty+1 respectively.
Finally, we have to indicate the height of the mesh at each control point. Figure 2.23 shows the a top view of a control grid for a ground definition. The numbers indicate the order at which heights should be input.
When loaded by the simulator the control mesh is triangulated in a trivial way (i.e., connecting each three contiguous vertexes as shown in figure 2.23) and it is displayed using a smoothing coloring technique so that it looks like a realistic ground.
The ground directory of the simulator includes the small utility new_ground that generates ground configuration files according to a template file named ground.tpl and with the user desired shape. The fields of the template file are the size of the ground to be generated, the density of the mesh, and the maximal height (Z coordinate). The result is a ground where heights are those given by the function ground_function defined in the file source/ground_function.c. This function can be modified to generate ground as required for each application. If it is modified, the new_ground program has to be re-compiled typing
![\begin{figure}
\centerline{
\includegraphics [width=0.45\linewidth]{images/figura_terra.eps}
}\end{figure}](img30.gif)
![\begin{figure}
\centerline{
\includegraphics [width=0.45\linewidth]{images/step.eps}
}\end{figure}](img31.gif)